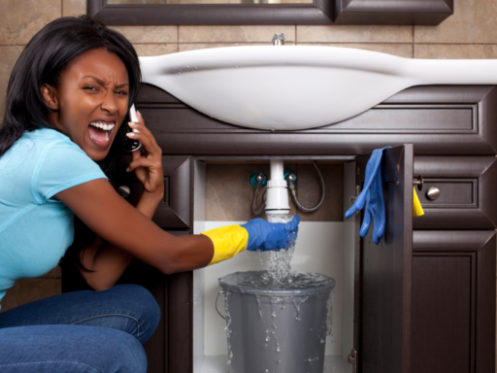
Plumbing problems are an unavoidable part of owning a home. Most problems are due to aging fixtures, normal wear, and tear, improper use, or lack of regular maintenance.
Sump Pump
Sump pump failures are either due to an internal unit problem or an external issue.
Causes usually include:
- An overwhelmed system after a heavy rain
- Stuck switch
- Aging – a pump older than 8 years will start to have problems
- Clogged discharge pipe
If the water in your sump pit is moving slowly or not at all, the discharge pipe (also known as the drainpipe) might be clogged. Here are a few simple steps to clean the pipe:
- If your pipe has a screen at the end, remove the screen and rinse it (the end of the pipe will be outside your home)
- Check the pipe for any obvious blockages and remove, and replace the screen.
- Unplug the pump or turn off the power at the circuit breaker.
- Remove the water in the sump pit using a wet-dry vacuum.
- Grab the pump by the handle or the pump body and remove the sump pump unit from the pit. Do not lift the pump by the float switch or power cord.
- Loosen the clamp that holds the drainpipe in place and remove the drainpipe from the main body of the sump pump.
- Insert a plumber’s snake into the end of the pipe that was connected to the pump, and then try to push the snake through toward the other end.
- Hold the pipe over a bucket or sink, and spray water down the pipe using a garden hose with a high-pressure nozzle if the plumber’s snake doesn’t remove the blockage.
- Run the plumber’s snake through again to loosen any remaining material inside the pipe.
- Spray water into the pipe a final time to rinse the remaining debris from the pipe.
- Attach the drainpipe to the pump and tighten the clamp to secure it in place.
- Set the pump gently back into the pit and reconnect the power. Turn the pump on and pour water into the pit to make sure the assembly works as it should.
Water Heater
There are several reasons a water heater isn’t providing enough/hot water or is leaking. The most common reasons are an old tank, heating element failure, corrosion or sediment buildup, loose/broken electrical connection, faulty or lose valves, and deteriorated anode rod.
Annual maintenance should prevent most water heater problems. Homeowners can perform annual maintenance or have a licensed and insured plumber who will inspect the water heater and the entire plumbing system. A homeowner can easily complete these maintenance tasks:
- Drain and clean the tank by using the drain valve to empty the water and then use a solution of bleach and water to clear away any mold or mildew.
- Check the components on the water heater and tighten loose parts as often as necessary.
Running Toilet
A running toilet can waste hundreds of gallons of water per day. This is not only a huge cost to the homeowner but also a huge cost to the environment. Three components could be responsible for a running toilet: the flapper, the fill valve, or the flush valve. Most running toilet fixes are straightforward and can be done by most homeowners.
Test the Flapper
Use a stick (a paint stirrer works well) to push down on the flapper. If the running water stops, that means the flapper isn’t sealing and needs to be replaced. To replace the flapper:
- Shut off the water supply valve under the toilet.
- Flush the toilet to drain the water from the tank.
- Unhook the flapper and replace it with a new flapper (make sure the new one is the same type).
- Hook the flapper chain onto the flush lever arm so there’s a little slack when the flapper is closed.
Replace the Fill Valve
- Shut off the water supply valve under the toilet.
- Flush the toilet to drain the water from the tank (use a sponge to suck up any remaining water)
- Remove the old valve
- Install the new valve.
- Turn on the water supply.
Replace the Flush Valve
- Shut off the water supply valve under the toilet.
- Flush the toilet to drain the water from the tank (use a sponge to suck up any remaining water).
- Unscrew the old flush valve
- Install the new flush valve (make sure the overflow pipe is facing the flush valve)
- Turn on the water supply and check for leaks.
Clogged Drains
Drain problems can quickly become plumbing nightmares if they are not dealt with quickly. Here are the most common causes and possible fixes for clogged drains:
Bathroom drain clogs are usually caused by dirt, skin flakes, and hair binding to the soap scum on the walls of the drainpipes. Possible fixes:
- Remove and clean the drain stopper.
- Use a sink (not a toilet) plunger (make sure to block the overflow drain in the tub or sink).
- Remove the drain elbow joint and clean it out.
- Routinely clean drain stoppers to prevent clogs
- Use a hair strainer drain cover to trap hair before it goes down the drain.
Clogged toilets usually happen when items that do not dissolve/break apart are flushed. Possible fixes:
- Plunge using a toilet plunger (toilet plungers have a flange; a rubber piece attached inside the cup and sink plungers do not).
- Use a hand-powered drain auger, which reaches 2-5 feet down the toilet drain to break up blockages.
Kitchen sinks clog when un-dissolved food particles, grease, and oil cake onto drainpipe walls.
- Run hot water down the drain, followed by a few tablespoons of dish detergent, and then run the hot water again.
- Plunge and repeat the hot water.
- Over-the-counter drain cleaners are never recommended (except for bio-clean). The chemicals in cleaners can cause irreparable damage by causing pipe corrosion. bio-clean is a unique blend of all-natural bacteria and enzymes used to eliminate waste buildup in plumbing and septic systems.
Dripping Faucets
A leaky faucet is usually caused by a damaged cartridge, broken washer(s), malfunctioning O-ring, or deteriorated valve seat.
Follow these easy steps to fix a leaky faucet:
- Shut off the water.
- Close the drain.
- Take the system apart (make sure to pay attention to the order and orientation of the parts as you remove them).
- Check and clean all the parts – seals, rubber washers, cartridges, and o-rings. Replace if needed.
- Reassemble the faucet
- Test the water flow.
Water Pressure
There can be several reasons for low water pressure. Inspect to see if one or more of these are the culprit:
- Clogged Pipes
- Leaking Pipes
- Corroded Pipes
- Clogged or Faulty Fixtures
- Broken Pressure Regulator
- Emergency Shutoff Valve at Fixture Isn’t Open All the Way
- Water Meter Valve or Main House Valve Isn’t Open All the Way
- Your Water Supplier is Having an Issue
Leaking Pipes
Leaking pipes can raise your water bill, disrupt water flow, and cause excessive water damage to your home. Below are the most common leaks, the causes, fixes, and prevention.
- High Water Pressure
Excessively high-water pressure can cause pipes to leak and even burst. When the pressure in your pipes is distributed unevenly, it puts unnecessary force on the rest of your pipes and causes leaks. High water pressure can also cause drip leaks from faucets, showers, and toilets. Use a water pressure gauge to test the pressure in your system. The ideal pressure is between 40 and 60 PSI. If the pressure is too high, you will need to repair or replace your home’s water pressure regulator. - Clogs
Water will always find areas to seep into. If your pipe is clogged, water will escape through any cracks in the pipe or caulking. This will disrupt the flow of water to toilets and showers and cause major water damage to ceilings and walls. Refer to the section on clogged drains above for more information on repair and prevention. - Corrosion
Corrosion in pipes is usually caused by the pH of water. If the pH is too low, it damages the protective layer inside the pipe and causes it to corrode. When there is too much oxygen in the water, it gradually turns metal pipes to rust. Minerals in the water also speed up the corrosion process. Once a pipe is corroded, the only way to fix it is by calling a licensed professional to replace it. - Damaged Pipe Joints
Pipe joints are the parts that connect your pipes. Joints are the weakest point of a pipeline and deteriorate and eventually leak over time. The repair can be used to repair pipe leaks on PVC and its joints. To repair your pipe or joint using epoxy, first clean and dry the damaged area, ensuring water can’t reach the affected area. Apply the epoxy and let it cure for ten minutes. After curing, let water move through the pipe and check for any leaks.


